
4/28/2009 FTPing to a Web Server
5/28/2008 RAM Installation Removing Programs from Startup
Disk Cleanup and Defragmentation 1/5/2008 |
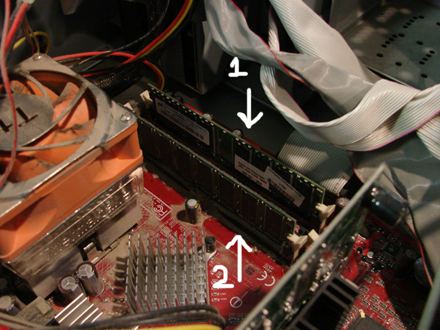
RAM Installation This tutorial will guide you through the steps needed to install RAM into your PC. If you do not feel comfortable opening your computer case it is best to let a professional handle installation. For those of you who wish to try on your own, all steps will be provided here.* RAM Installation The first step will of course be to locate the RAM inside of your computer. You will need to figure out how your case opens as it varies from case to case, some have doors that swing open, and others you have to pull the whole metal shell off. Be careful when unscrewing your case not to unscrew anything holding the power supply in place as it is a possibility for it to fall down into your computer system. Make sure the power is unplugged from your computer. Once the case is off the RAM is usually located to the right of your heatsink/fan on top of your processor.
Depending on your computer configuration it may have more or less RAM chips in it, and even more or less ports to install them. Once you have located the RAM chips above the first step is going to be to push down the levers on either side of the RAM chip.
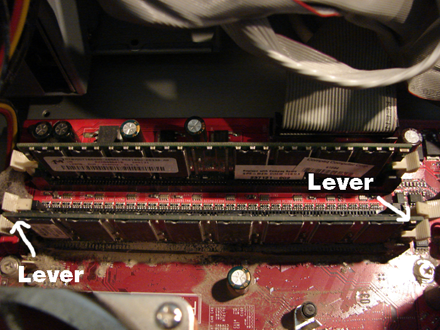
As you push the levers down you will notice that the RAM pops out of its socket, it is important to use these levers to prevent damaging your motherboard and/or RAM. Sometimes pushing the levers down is all you have to do, other times you will have to pull a bit to get the RAM out.
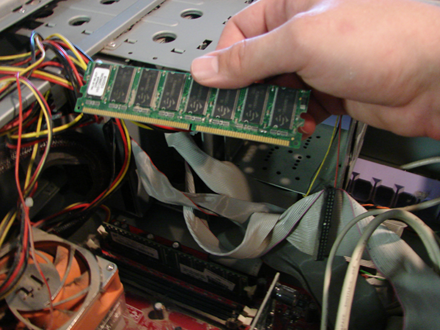
You will notice in this picture that the lever highlighted is down instead of sticking into the chip, you then may need to pull upwards to dislodge the RAM stick the rest of the way.
The RAM is now dislodged so that we can figure out what type we can use to replace it. Generally this will be on a sticker somewhere on the chip, however, some RAM coming from corporate manufactured computers do not have labels and you must get the information from the company or your user manual.
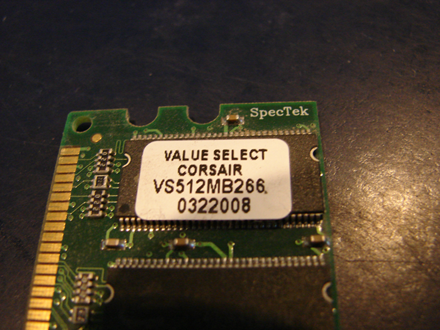
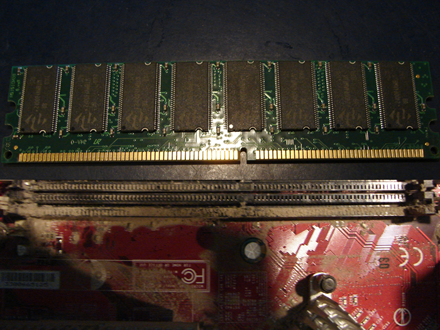
Important information we are looking for is mainly what brand the ram is (Corsair), the amount of memory it contains (512MB), and finally what DDR rating it is (266). Some RAM make it easier to find this information than others. Some manufacturers label their chips with PC ratings such as PC3200 instead of DDR also. Both of these statistics will be labeled on the RAM you buy so it shouldn't be much of a problem either way. It is important not to mix and match different RAM types as much as possible. The RAM may carry different timings from the manufacturer and can slow performance down when paired together or may cause your machine not to boot at all. Most RAM have their timings labeled on the packaging and they will come in 4 numbers such as 4-4-4-12, generally the lower the first number the faster the RAM is. Once you have bought the RAM the process of installing is the exact opposite, just make sure the levers are down and insert the RAM. One thing that sometimes tricks people up is that they are putting the RAM in backwards. The RAM will only go in one way as is illustrated in the last photo of this tutorial.
*The Computer Cure is not responsibile for any damages that occur during self installation of hardware, we will however be happy to fix your issue if you happen to run into any problems. |
|

![]()